The following article describes how to manage data on the CLOUD interface.
> Data on cloud interfaces deployed by ETISENSE remain the property of the customer and are hosted on a secure server.General introduction
The Cloud is a remotely hosted ANALYSIS SERVER. The cloud interface offers all LASA software features for complete analysis of data acquired with a START, ADVANCED or NANO system.
Unlike the previous mentioned acquisition systems, this interface is hosted on the Internet and acquisition is not possible. It is distinguished by a purple header.
This interface can be used in a number of cases, for example:
- finalizing data analysis for a system that does not allow it (e.g. NANO system), or after a system has been returned at the end of its rental period (e.g. ADVANCED system)
- Time-saving parallelization of data acquisition (system in animal facility) and analysis (new data available for analysis on the Cloud) during a study.
- replay data to test a new software version before updating a system...
If you're using data acquired by an acquisition system during a study, you will use the data transfer feature available in the DECRO range of systems enables data to be transferred from a system dedicated to acquisition (ACQ) to the cloud analysis server (SRV). This feature is available on systems with a lasa software version later than 2.17.
Deployment and connection to the CLOUD interface
The cloud is deployed on request following an order by ETISENSE at a defined date and for a defined duration. An email will be sent by us providing a connection URL to the interface, a login and a password for an administrator account
 The elements provided below are based on a generic model. To ensure confidentiality, it is preferable to define personal logins and disable the default access account.
Simply enter the URL in your web browser from a PC with an Internet connection. Once the ETISENSE logo is visible, you can enter your LOGIN and PASSEWORD in the appropriate fields. The Home page appears, you are connected to the interface.

You will find the storage capacities of your interface in the clock.
🡪 Before downloading data, check the capacity of your interface. The risk of saturated storage space is the inability to execute CPU-intensive features such as display, detection, analysis, restore or data export.

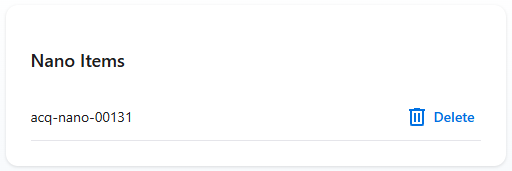
- A cloud button  is available in the header to view and manage paired acquisition systems, if any (To pair an acquisition system, see next section). The DELETE button can be used to separate two elements.
Data transfert for analysis
A – Data transfer summary
There are two ways of transferring data between the ACQ and the CLOUD:
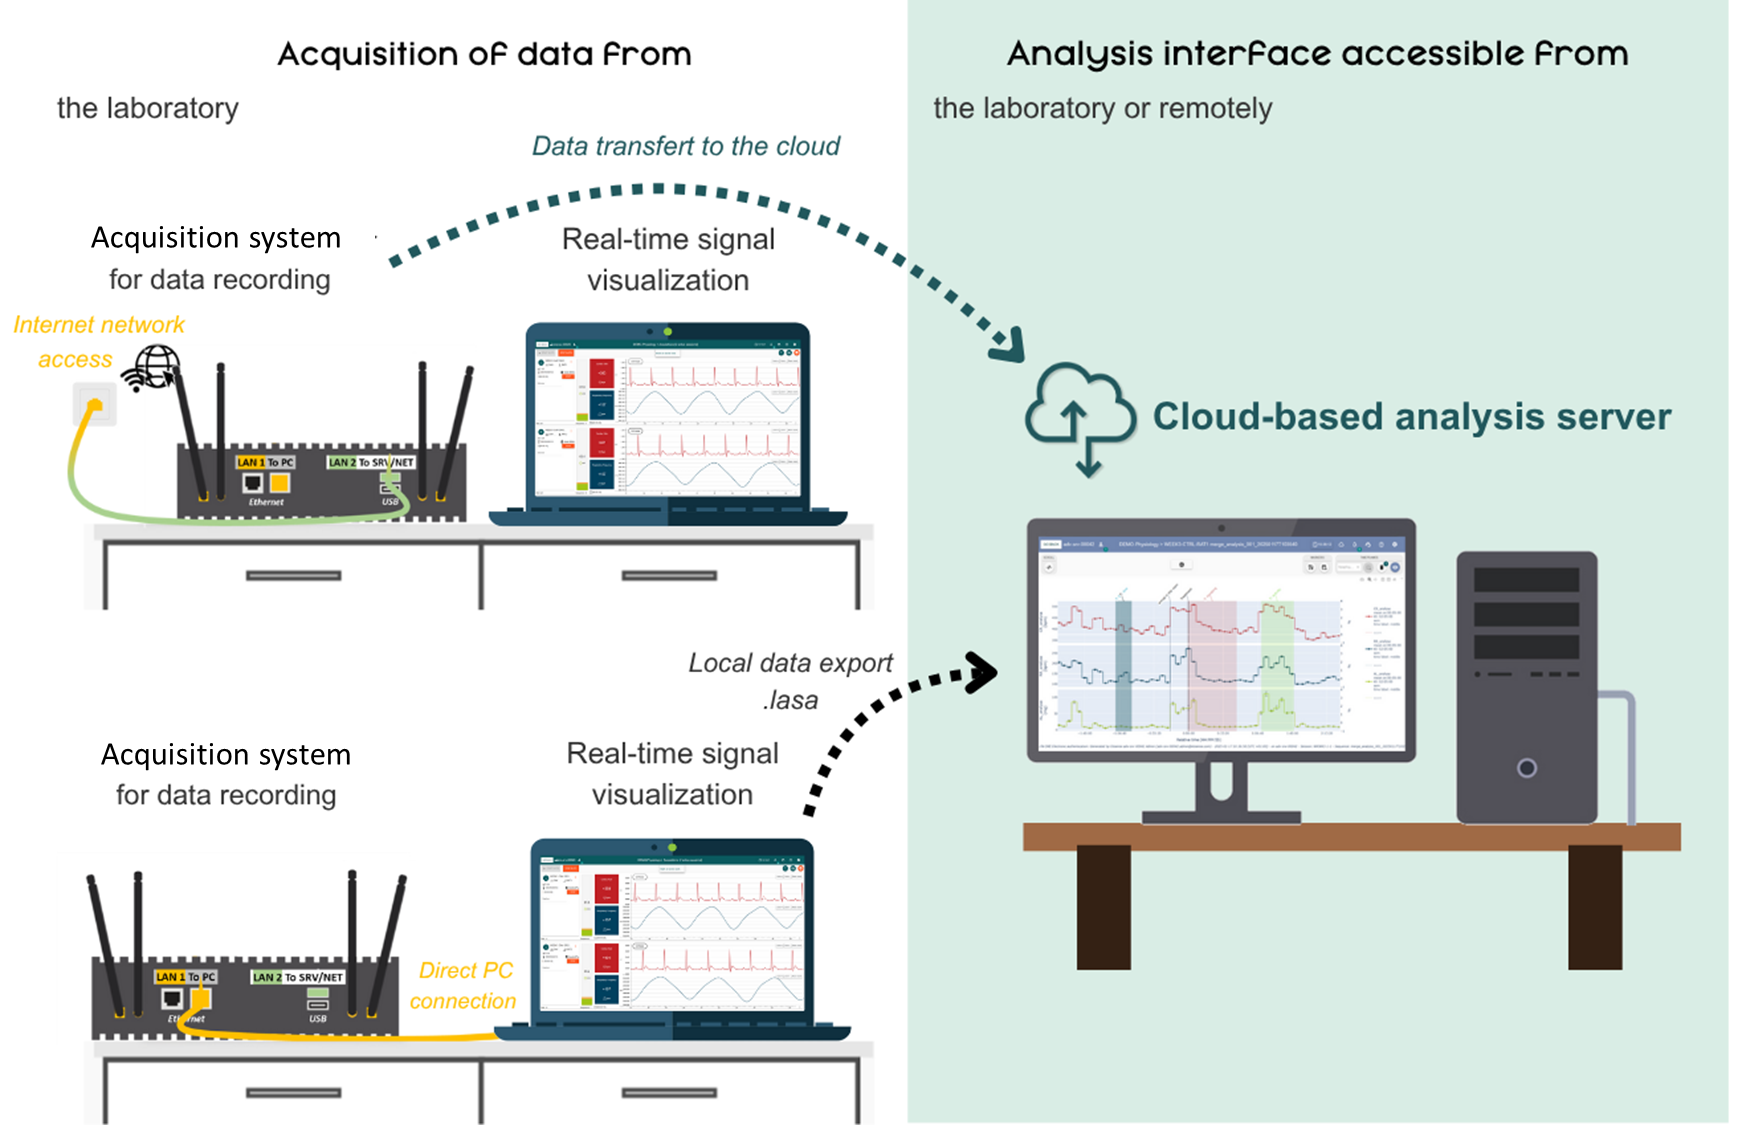
- When a cloud is deployed, it is possible to link it to a pre-configured network acquisition system. This means that data can be easily transferred from the ACQ to the CLOUD via the Internet, without having to go through a download and import stage. (TOP)
- If pairing is not possible between ACQ and CLOUD, which can happen at the start of a study when the acquisition system is not connected to the Internet and network, or when IT does not approve networking. In this case, data must be in .lasa format, previously downloaded and exported from an acquisition system. (BOTTOM)
B – Data transfer directly by pairing the ACQ with the CLOUD (internet)
> Pairing and data transfer between the two components
When a cloud is deployed, it is possible to link it to an acquisition system, if the configuration of the acquisition system allows it:
- The acquisition system present in the animal facility must be connected to the network and Internet.
To enable the acquisition unit and the CLOUD / analysis server to be networked and send data to each other (LAN2), you must check with your IT department that the following ports are open : Port 443 (HTTPS) and Port 22 (SSH - rsync)
- And the DATA TRANSFER logo must be present on this system's homepage (Acquisition system header is green).
If pairing is not possible between ACQ and CLOUD, which can happen at the start of a study when the acquisition system is not connected to the Internet and network, or when IT does not approve networking (Please refer to the next part)
The first step is to link the two systems so that data can be transferred from the ACQ to the SRV CLOUD.
A form
called ‘Pair to ...’ should appear. It contains the following fields:
To combine
the two elements, you need to enter
the previous SRV credentials given by ETISENSE by email. Generally, the login will be your first name.surname@etisense.com. Once
validated, this information enables the acquisition system to connect to the analysis
server. Once the two elements are linked, this page appears:
If pairing
with the SRV fails, the ‘Retry’ button can be used to restart the
connection attempt.
If the RETRY button
doesn't disappear after several tries, it's because your browser doesn't recognize the analysis server as a “reassuring website” for browser certificate issues. In this case, first log in using a new web tab and the server's connection URL/IP address to authorize the browser to continue to the system, as per the
procedure below.
Once the certificate is valid, try the RETRY button again and the DATA TRANSFER page should load on the acquisition unit.
To separate
the two elements, simply click on the information button on your storage space:
And click
on UNPAIR.
1.
Analysis server expiry date.
Date displayed when a CLOUD interface is rented, otherwise not defined
on an on-site system.
2.
Remaining storage on the analysis interface.
If space is becoming limited, the value
changes to red.
3.
Information button.
Displays the previous popup with details of ACQ and SRV storage, the option of
visiting the analysis server and the option of unpairing the two elements.
4.
Connection status
between ACQ and SRV.
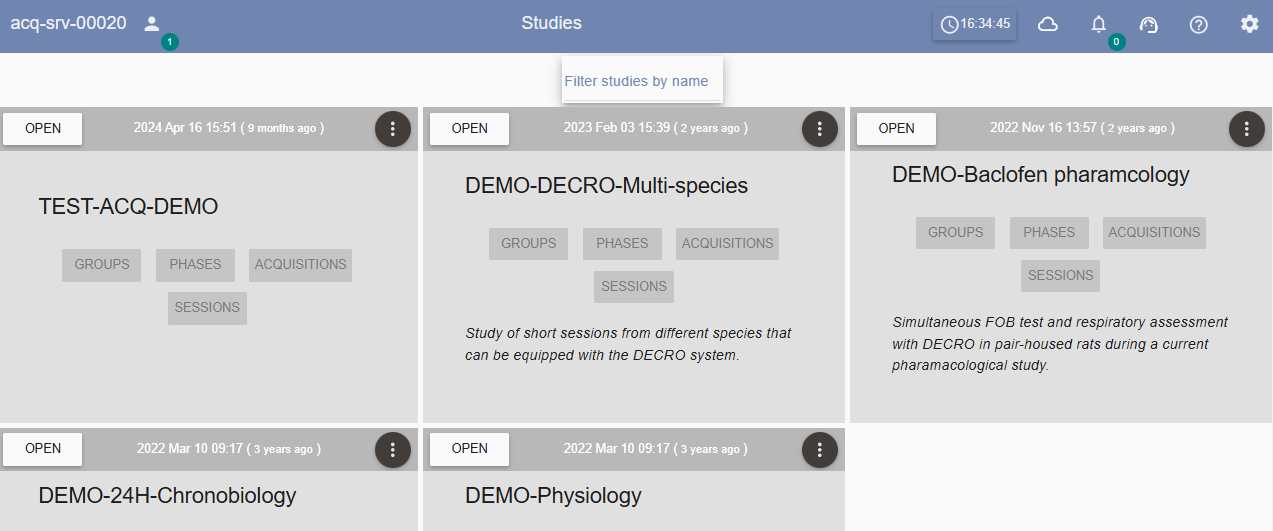
5. Study
search bar
6.
Refresh button.
If
you have just performed an action on a study (Close or data transfer), this
refreshes the associated information.
7.
Filter list.
Click
on a column heading (Name, local size, etc.) to select the display order
(ascending or descending).
8. Data
transfer action buttons.
These are described in detail in the next section.
> Data transfer actions
There are three ways of exchanging data between two systems:
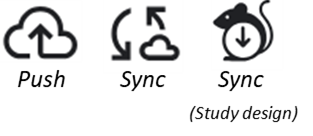
The PUSH
action is used to save new data (Session) or changes made to the study
(additional subject) from the acquisition system to the analysis Server (example of use: Saving new acquisitions for detection in the SRV).
If a study
is present on both elements but there is a discrepancy in status,
the status
of the data on the analysis server takes priority.
For
example, if new sessions have been created following an acquisition and then
added to the analysis server study with a ‘push’. If one of them has been Detected
(post-acquisition feature) in the meantime on the analysis server: the push
will not allow the visualisation MERGE (data view button) on the acquisition
system. The push is only used to send data, a SYNC must be used in this case.
The SYNC
action allows you to save and synchronise
- an
existing study on the Analysis Server only: Imports the new study or the
modifications created on the Analysis Server into the Acquisition System.
- A
study presents on both systems: Merges the version of the study on the
Acquisition System (creation of elements or data) and that on the Analysis
Server (creation or modification of elements or data).
If a study
is present on both elements but there is a discrepancy in status,
the status
of the data on the analysis server takes priority.
For
example, if new sessions have been created following data acquisition and then
transferred and detected only on the analysis server. If a SYNC is performed,
these will also be detected with the MERGE display available on the acquisition
system.
The SYNC
STUDY DESIGN action saves and synchronises design data (group,
subject and phase).
For
example, if the study design has been modified by adding individuals to a group
on the analysis server in order to prepare the acquisitions. If a SYNC is
performed, the new individuals will also be added to the acquisition system.
> How to transfer your data?
To transfer
data from one element to another, simply click on the action of your choice.
Data
transfer actions are only available on acquisition units/systems.
You have
the option of PUSH/SYNC:
1- By using
the data transfer view,
which lists the various studies, and select the action at the end of
the line for the study whose data is to be transferred.
2-By
ticking one or more studies whose data is to be transferred
and selecting the action at the top
of the table.
3- By going
to the home page of your ACQ system and using the study menu to click on
one of the actions to transfer data.
Note that
the above buttons are only available if the study is closed on the
acquisition system and/or on the analysis server : data transfer is
impossible if the study is open or compressed.

Once an
action button has been clicked, a loading popup is displayed until
communication between ACQ and SRV has been checked and everything is OK for the
transfer:
Once the
verification is complete, this popup will be displayed.
In the
image above, data from several studies with different states will be
transferred to illustrate the possible cases. Three lists are displayed:
> The
study is present on both systems and the data will be transferred by a SYNC
between the ACQ and the SRV
> The study is present only on the ACQ and cannot be SYNC until a PUSH is
performed.
> The study whose data has already been transferred and is up to date on the
ACQ and SRV
Only the
STUDIES TO SYNCHRONIZE state will be performed.
If there is
no space on a system for this transfer, a message is displayed and the
operation is blocked.
Once the
transfer has started, the study has a green background, with a progress bar.
The study
also appears in this state on the ACQ and SRV home pages.
Once the
download is complete, you will once again have access to the ACQ and/or SRV
data.
C - No pairing possible between ACQ and CLOUD.
If pairing is not possible between ACQ and CLOUD, which can happen at the start of a study when the acquisition system is not connected to the Internet and network, or when IT does not approve networking.
In this case, data must be in .lasa format, previously downloaded and exported from an acquisition system.
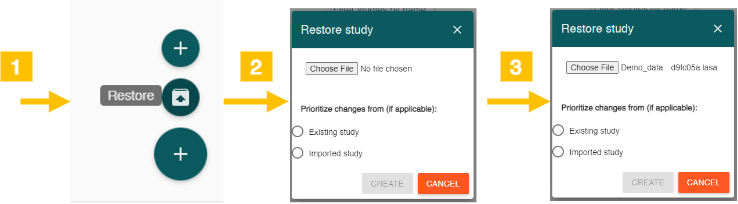
If the data (session or study) has been previously exported in .lasa format, follow the steps below.
Procedure for exporting a study (ACQ)

Procedure for exporting a session (ACQ)

Data will be restored to the cloud interface according to this procedure. To find out more about exporting and importing data, click here.
Procedure for data restoring (SRV CLOUD)